The treatment of fragmented gauze sleeves in an 18th-century theatre costume
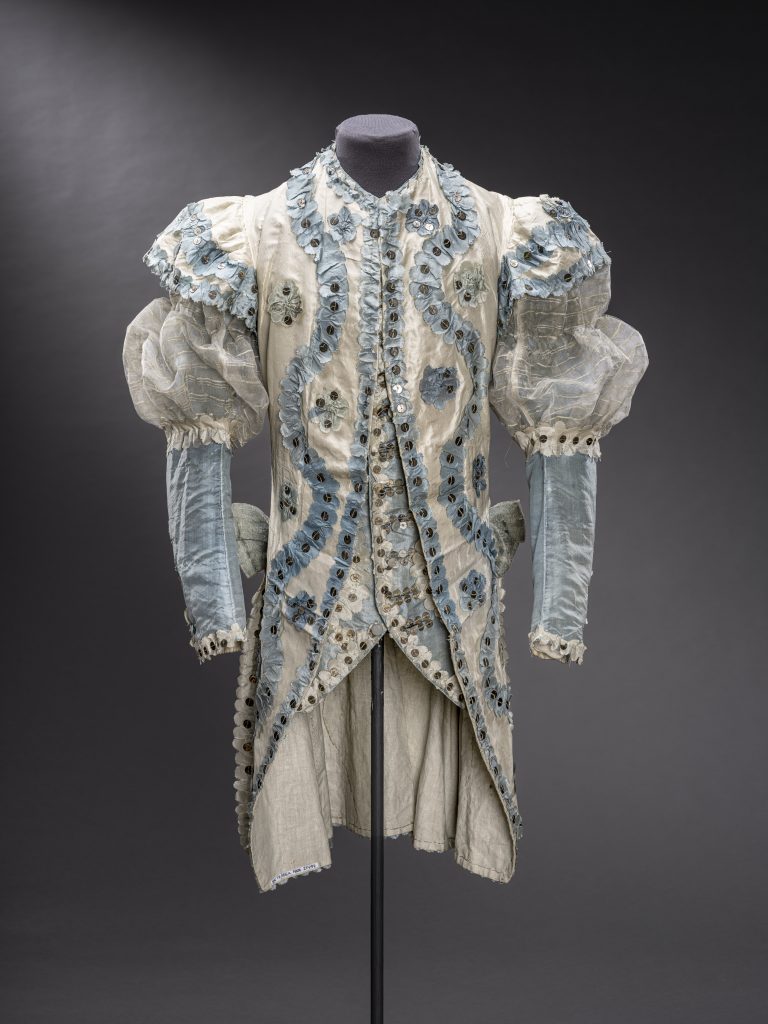
Photo: Jens Mohr/ SHM
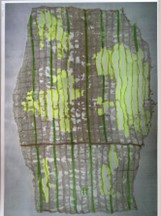
During my five-month internship at SHM, I worked on an 18th-century demi-character dance costume for the exhibition “Teaterkungen” at Livrustkammaren. Multiple aspects of the costume needed treatment. If you would like to know more about the treatment of the row of buttons on the jacket of which most had lost their wooden core you can read this blog post. The most fragile components of the jacket were the fragmented gauze sleeves which had been adhered to a white net with a squared structure during a previous restoration. Over time, the sleeves became deformed, and the original gauze was no longer properly attached to the net (fig. 1). The stability of the sleeves is important since a vest is worn over the jacket, thus putting stress on the sleeves. To be able to display the ensemble together on a mannequin, treatment of the sleeves was necessary which was only possible if they were removed from the jacket. Since there was lots of uncertainty regarding the fragility of the sleeves and how they would react to the treatment, every step in the process was carefully assessed and discussed.
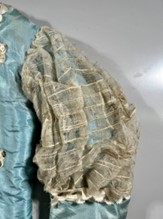
The left sleeve before treatment, the original gauze is no longer properly attached to the conservation net. Photo: Author
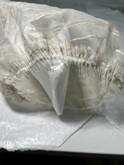
The treatment was initiated by removing the top stitches, after which the sleeves were found to be proficiently flexible to withstand the continuation of the treatment. The sleeves were taken off the jacket and laid out flat (fig. 2). To flatten them further and relax the fabric, they were treated section by section with an ultrasonic humidifier. Another round of flattening was performed but now with the addition of weights during drying. It was noted that the adhesive became slightly tacky due to the mist which could come in handy for the attempted removal of the conservation net. A starch test was also performed to gain more information on the adhesive, and it came back positive for starch.
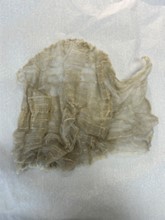
The left sleeve after being removed from the jacket. Photo: Author
To be able to reattach the sleeves and make them stable enough for handling it was chosen to sandwich the fragile gauze between two protective layers. It was decided to place the sleeve face down on a textile carrier after which the old net could be peeled off (fig. 3). This method requires the addition of a support to replace the function of the old net. Different materials were taken into consideration for the support of the gauze sleeve. Nylon tulle is almost invisible, yet presumably also the most abrasive. Silk tulle is much softer, but this is too opaque and therefore very disturbing when placed on the gauze. For the overlay, a silk crêpeline was selected since it limits the loss of material more than an open weave fabric. However, a colour that lifts the original without being too white had to be found. It was decided to dye a new piece of silk crêpeline in a slightly off-white colour.
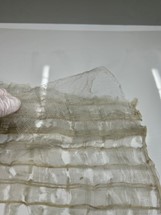
Peeling off the old conservation net with the help of an ultrasonic humidifier. Photo: Author
To continue the treatment, nylon tulle was placed on top of the flattened sleeve. The whole was then turned over to reveal the old conservation net which was slowly peeled off with the help of cold mist. After this, the dyed crêpeline was rolled out on top. The stitching was done with one strand of hair silk since this was almost invisible and not much strength was required from the threads. The placement of the stitches was mapped out beforehand (fig. 4). The first stitches (in yellow) were placed around the losses. Since the sandwich did not feel secure enough after these were finished, horizontal rows were added to keep all layers in place.
The location of the stitches that were added to the left sleeve, the yellow lines go around the losses and the green ones were added to make the sandwich more secure. Photo: author
The sleeves were ready to be reattached. To do so, both ends were pleated to accommodate the extra length of the gauze. Very small pleats, almost like gathers, were made to ensure that the volume of the sleeves would be distributed evenly (fig. 5). The decorative ribbons around the underarms were flattened and placed back at the same time as the lower seam of the sleeve. Finally, the thread that was inserted through the centre of the sleeves was pulled to create two separate volumes (figs. 6-7).
The small pleats that were made in the sleeves before they could be reattached. Photo: Author
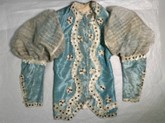
The sleeves after they were reattached but before the thread in the middle of each was pulled. Photo: Author
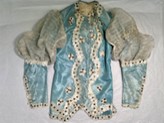
The sleeves after the threads through the middle were pulled. Photo: Author
During the mount -making for the costume, it became apparent how much the sleeves had improved because of the treatment. They are still in a fragmented state but due to the sandwich the losses no longer stand out and the sleeves look whole again. While reattaching, the sleeves could be reshaped, giving them more volume and bringing them closer to the original look. Before treatment, the loss of material was imminent since the gauze was no longer properly connected to the conservation net. The gauze remains fragile, and material can still come off during handling or display, but the losses will be contained in the sandwich. After this successful treatment, the costume is ready to shine in the exhibition!
/ Willemijn Bolderman, Intern, spring 2023